Importing and Exporting
Importing Data
Money offers great flexibility to import data. Whether you are switching from another finance management tool, or wishing to import data from a financial institution, Money has you covered (Direct Downloads require subscription). Money supports QIF, OFX, QFX, CSV, and MT940 formats for data import. Money can export data in a very flexible and widely supported CSV format.
Connecting to financial institutions via Direct Downloads (requires subscription)
- When creating or editing an account, start entering a name of your financial institution into the eBank Website field: a list of available institutions will appear;
- Choose the right institution, and you will be taken to the service provider’s login window. Follow the instructions on screen to log in;
- Once saved, Money will regularly connect to the institution and download your transaction data automatically.
Note: various institutions provide data in different frequency, so while some institutions may update more often, the most common frequency is daily. Many banks have various methods to protect themselves from potential cyber-attacks, which often includes blocking numerous repeated requests made in quick succession – it can result in delays until they allow your connection. Therefore, it is best to not overuse the Download Transactions button – if there are any problems, Money will display a message about it.
Historical data: not all institutions provide historical account data via directly connected accounts. However, most of them allow downloading an archive of your transactions via online banking. You can do that, and then import historical data by using the steps below for “Importing data from a file on your computer”.
Importing data from a file on your computer
- Select File > Import;
- Choose a data file on your computer and click Open;
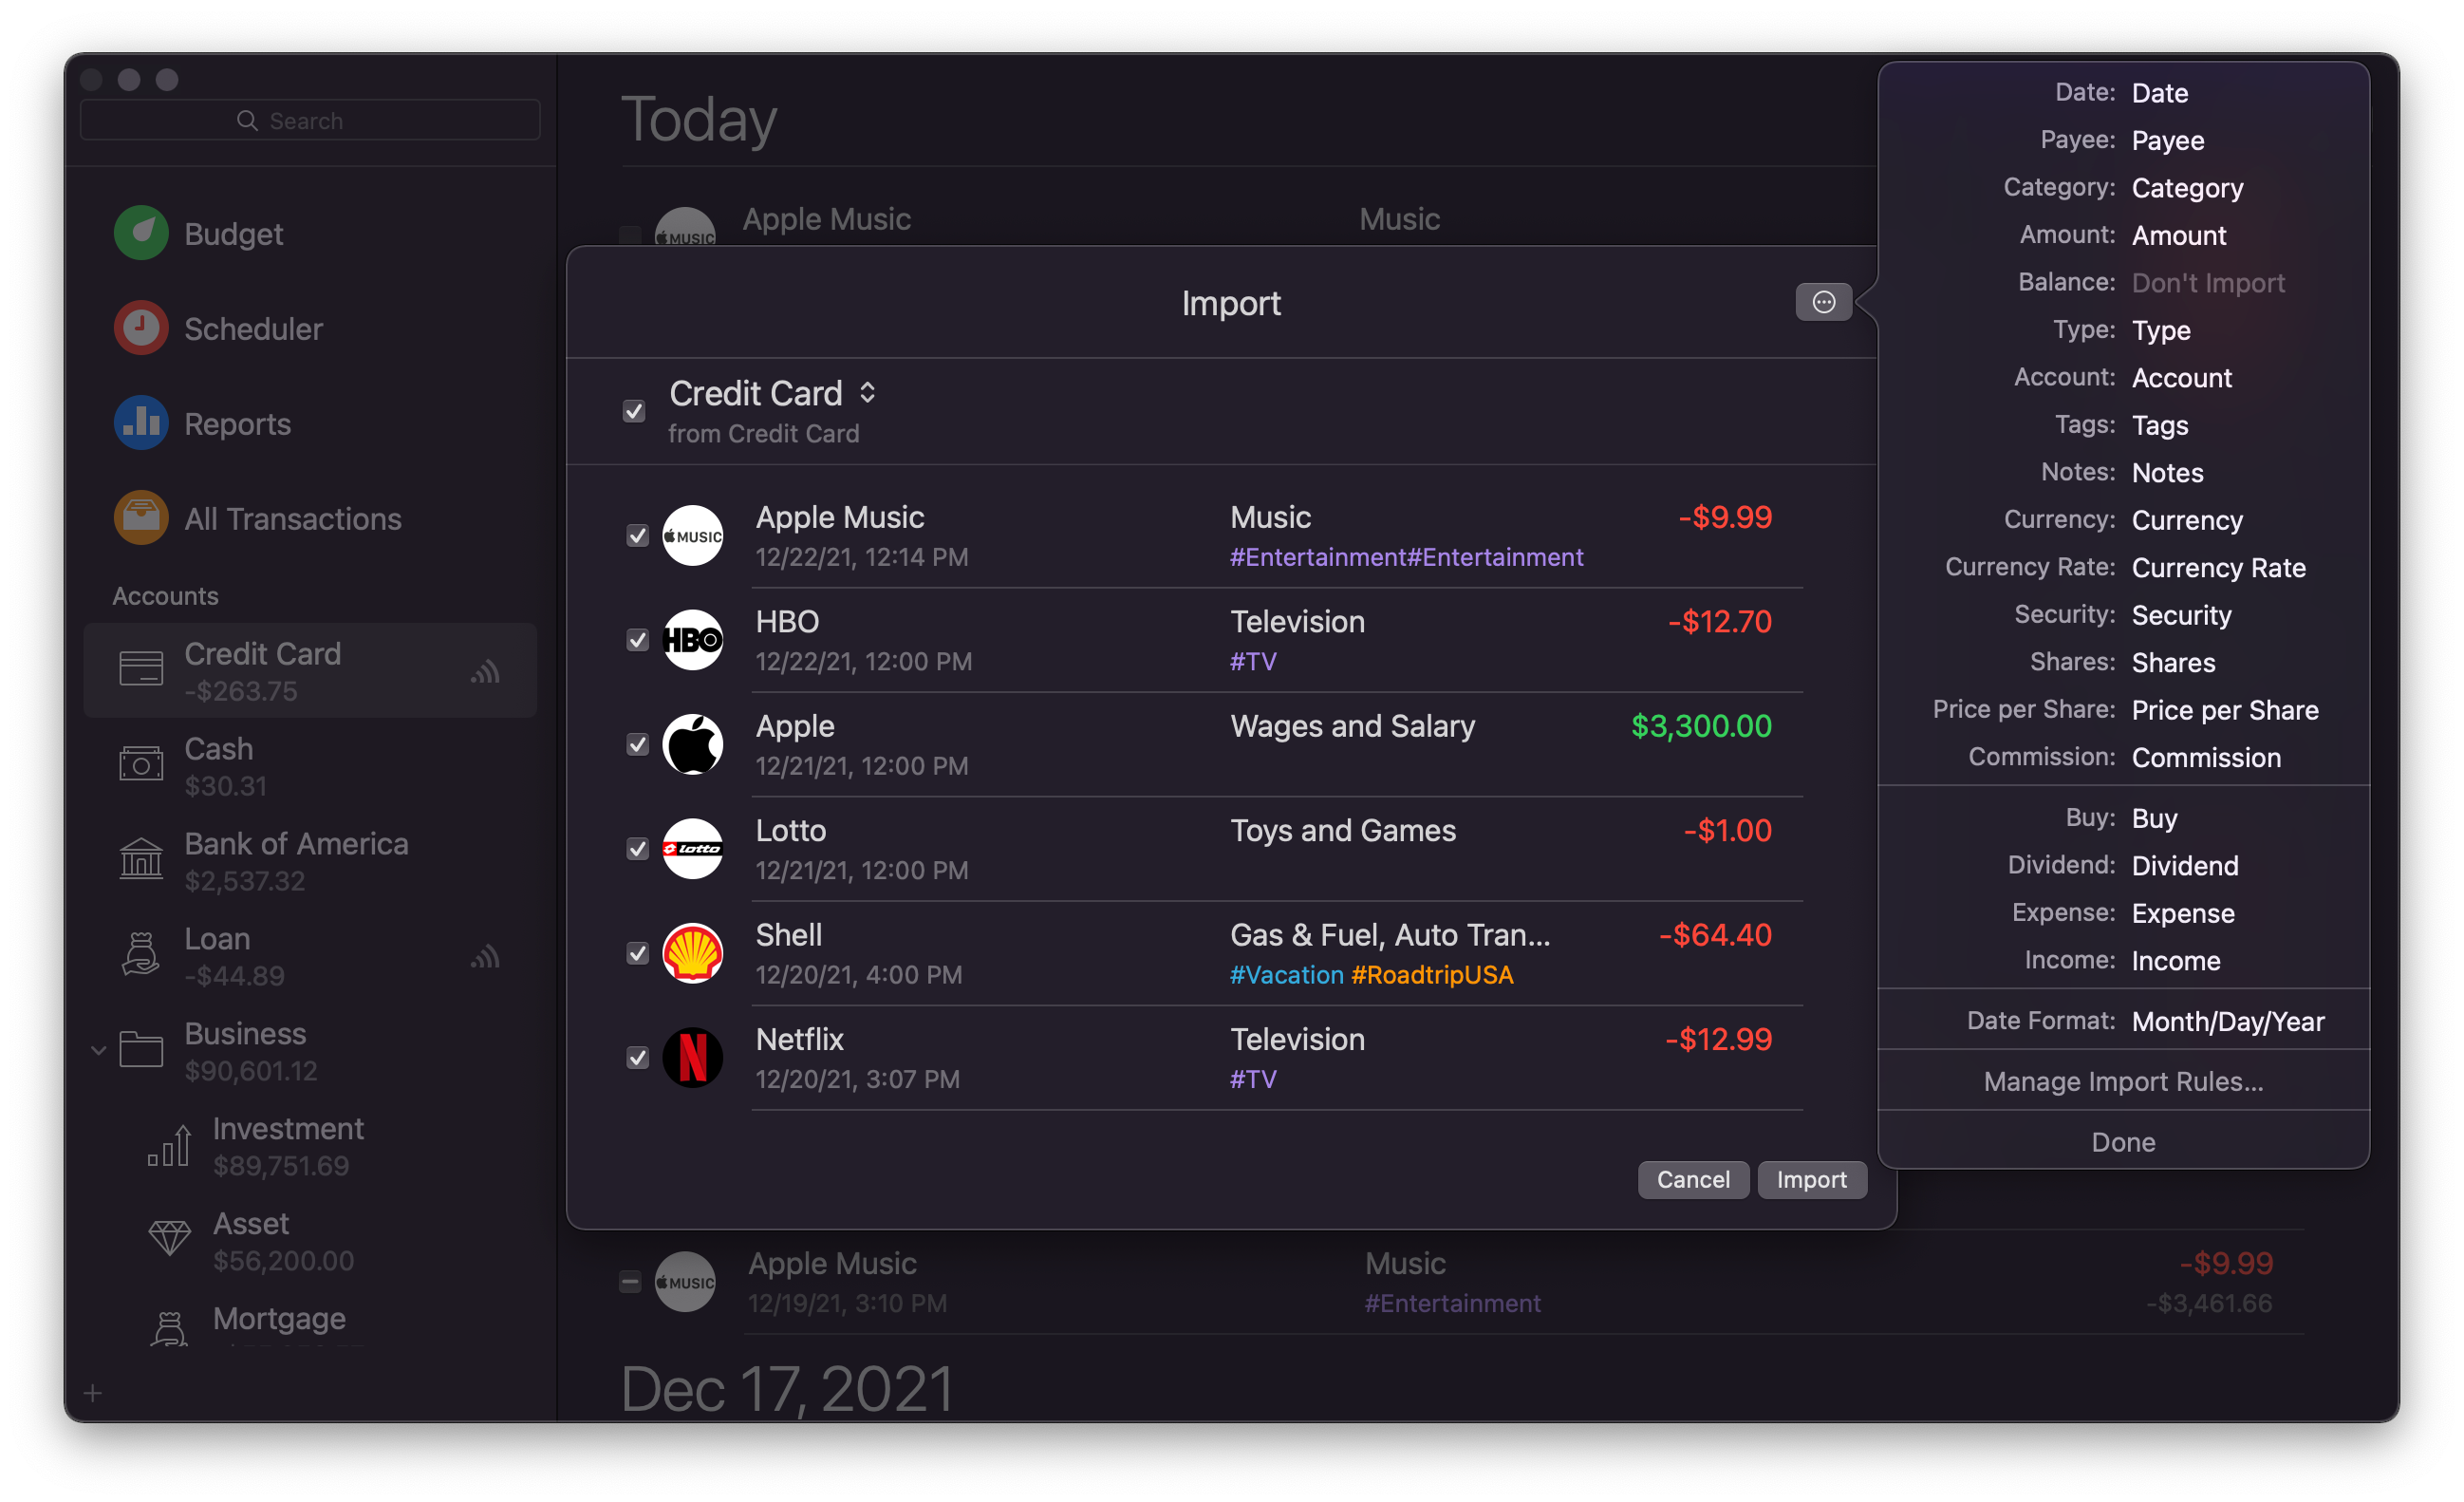
- Select an account for importing and make any changes to the list of transactions if necessary;
- Click the gear icon to make more detailed adjustments on how to import data: change the destination for each data field and date format, adjust import rules if necessary.
Importing data from your online banking account
- When creating or editing an account, enter the URL to your online banking account in the eBank Website section;
- A new section called Web Bank will appear in the workspace, it will show a website of your bank. Follow the usual routine to log into your bank account online. You will be asked to enter your username and password;
- Once you are in your online bank account, save the account statement in one of the supported formats. Money should detect the file and start importing it. If not, you may need to import the file manually;
- You will be able to use the Web Bank you have created on a regular basis. It will stay in the workspace of the account.
Importing data from previous versions
Money 7 uses a database format compatible with Money 5 and 6, so updating the app automatically makes the transition for you.
If you wish to import your data from Money 4 and have your data file on your Mac, you can use the File > Import menu to import data. This will copy all the data from your Money 4 file into the current version of Money (the source file will not be modified).
Data from Money versions older than 4.0 can no longer be imported.
Exporting data
Exporting account data to CSV:
- Select File > Export;
- Name the file and choose the location for saving, then click Save.
This will create a CSV file with the transactions of the selected account. The exported CSV file may be opened with other finance or spreadsheet applications.
Note: If you intend to export data for safekeeping, we recommend using iCloud synchronization and Local Backups instead.
Printing account data:
Money can also prepare a printout of your account data. To print your transactions, use the File > Print menu or press Cmd + P while in an account.